How to keep using an old version of iTunes on Windows with a modern iPhone/iPad/iPod

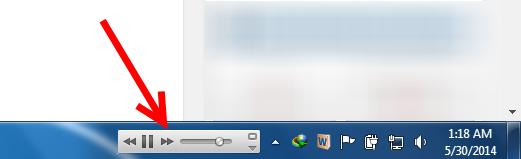
Older versions of iTunes for Windows (e.g. 10.7.0.21) were great. They had support for a taskbar-embedded player and could minimize to the system tray. They weren’t completely full of bloat and had a simple, usable interface.

In newer versions of iTunes, all this changed. The interface was made worse (particularly the display of album art) and the incredibly useful taskbar player was abandoned. As is often the case with large software providers, users complaining about this were ignored.

The sorely missed taskbar player can be yours again

So you might be thinking, “If you like the old version of iTunes so much, just keep using it!”

However, if you use an old/unsupported version of iTunes you may find yourself unable to connect to or sync with modern devices (iPhones/iPads/iPods) because they’re too new.

Fortunately there is a workaround, although it’s not super elegant and does require a little bit of technical knowledge.

You can continue using the older version of iTunes as your music player and still be able to sync your devices by running a newer version of iTunes in a Virtual Machine (VM) and using that verion to sync your music library with your devices.

You do not have to duplicate or copy your music library to the VM; instead you can force the VM iTunes to access your existing music files via the local network instead.

Instructions:

  1. On your real PC, browse to Documents\My Music\iTunes and copy iTunes Library.itl to the VM’s desktop.

    This library file contains a list of all your music tracks and their corresponding filenames, so we need to re-create the same directory structure and filenames for your music within the VM.

  2. On your real PC, share your iTunes music folder on your local network (right click -> Share).

  3. On the VM, create a “fake” music folder by recreating the identical parent directory structure of the real folder.

    E.g. if your real music folder is C:\Media\Music\Albums, create an empty folder on the VM at C:\Media\Music\

  4. On the VM, open Command Prompt create a symbolic link in your “fake” folder which points to the real folder shared on the local network:

    mklink /D "C:\Media\Music\Albums" "\\yoursharepath\Albums"

    Now that your music “exists” on the VM, you’re ready to set up iTunes.

  5. On the VM, install the latest/new iTunes. Before launching it, copy the “real” iTunes Library.itl from the desktop to Documents\My Music\iTunes.

    Important: you will need to re-copy the iTunes library file every time you update your music library on your real PC. E.g. if you add some new tracks on your real PC, they won’t appear in the VM iTunes until you do this.

The above process will essentially duplicate your iTunes library within the VM, with iTunes sourcing all your music from your shared folder over the network.

You can now plug in your iPhone, connect it to the VM (e.g. on VirtualBox this is done by right-clicking the small USB icon at the bottom of the screen and choosing Apple iPhone) and then use iTunes within the VM to sync with your devices.

Fixing the Cuisinart CEK-50 Cordless Electric Knife

Recently I had the misfortune of my Cuisinart CEK-50 cordless electric carving knife becoming defective. It was running continuously, even when the trigger wasn’t held down, and wouldn’t stop unless held at a specific angle.

As always with cheaply-made plastic consumer crap, the culprit was a 1¢ piece of plastic on a $3 component.

Specifically, the microswitch connected to the knife’s plastic trigger had its tiny actuator snap off. This meant the knife was running all the time unless the actuator was forced out of the switch (into the “off” position) by gravity.

What follows is a very rough guide to repairing the knife. It should take about an hour.

You’ll need:

  • A soldering iron and solder.
  • Heat-shrink tubing.
  • A Torx 9 bit.
  • A Philips 3.5 bit.
  • A pry tool and/or spudger.
  • A replacement microswitch (assuming that’s your issue) – it’s a Merchant CMm SM-51 16(4)A 125/250VAC, but any 16A switch of the same form factor should do.

  1. Unscrew the one visible torx screw at the base.
  2. Pop the clamshell casing using your pry tool:
    1. Two small tabs – front and back – hold the base cap in place.
    2. Two small tabs – front and back – hold the top cap (very tightly) in place.
    3. Several plastic tabs up each side of the case hold the body in place.
  3. Undo the four visible Philips screws – two under the bottom cap and two under the top cap – to fully release the case.
  4. Inside, on the other side of the knife’s trigger, you’ll see the white plastic blade holder mechanism. The microswitch is underneath it.
  5. Remove the four screws from the white plastic and two screws in the black plastic just down from it.
  6. There’s a small black plastic “bridge” which acts as the safety slider – gently pry it off at each side.
  7. The white plastic can now lift out.
  8. On one side there’s another small black plastic arm which is what connects the trigger to the microswitch. Remove it.
  9. Pull the microswitch out from under it.
  10. De-solder the existing wires.
  11. Put your new switch in.
  12. Apply heat-shrink tubing and solder the wires up again.
  13. Re-mount everything the way you found it.
  14. Enjoy.

You can test your new switch works before soldering by holding the neutral and live wires to their terminals and pressing the actuator.

Hidden plastic lugs which need to be pried open.
Hidden plastic latches hold the top cap on extremely tightly.
The SM-51 micro switch showing the broken actuator and N/L terminals.

Direct download links to patch the recent WannaCry ransomware exploit (KB4013389)

Many recent articles about the WannaCry ransomware virus report that Microsoft has issued a fix to patch the issue. However, as is typical of today’s poor-quality mainstream journalism, the articles don’t include any links to the patch. So here are the links.

Windows 7: Install SP1 first and then use the links below.

Windows 7 SP1 32 bit: http://download.windowsupdate.com/d/msdownload/update/software/secu/2017/02/windows6.1-kb4012212-x86_6bb04d3971bb58ae4bac44219e7169812914df3f.msu

Windows 7 SP1 64 bit: http://download.windowsupdate.com/d/msdownload/update/software/secu/2017/02/windows6.1-kb4012212-x64_2decefaa02e2058dcd965702509a992d8c4e92b3.msu

Windows 8 32 bit: http://download.windowsupdate.com/c/msdownload/update/software/secu/2017/05/windows8-rt-kb4012598-x86_a0f1c953a24dd042acc540c59b339f55fb18f594.msu

Windows 8 64 bit: http://download.windowsupdate.com/c/msdownload/update/software/secu/2017/05/windows8-rt-kb4012598-x64_f05841d2e94197c2dca4457f1b895e8f632b7f8e.msu

Windows 8.1 32 bit: http://download.windowsupdate.com/c/msdownload/update/software/secu/2017/02/windows8.1-kb4012213-x86_e118939b397bc983971c88d9c9ecc8cbec471b05.msu

Windows 8.1 64 bit: http://download.windowsupdate.com/c/msdownload/update/software/secu/2017/02/windows8.1-kb4012213-x64_5b24b9ca5a123a844ed793e0f2be974148520349.msu

Downloads for other operating systems can be found by clicking the OS name here: https://technet.microsoft.com/en-us/library/security/ms17-010.aspx#ID0EHB

Solving error 80070422 “Failed to configure Windows updates”

There are various solutions floating around for the Windows Update error “80070422” (aka 0x80070422) but none of them worked for me.

Here’s what worked:

  1. Start -> Run -> type services.msc
  2. Ensure the following services are all set to “Automatic” startup:
    1. Windows Update
    2. Windows Firewall
    3. Windows Modules Installer
    4. Background Intelligent Transfer

Trillian messenger skin: “Trillian Live Messagewindow”

Here’s a mirrored copy of the Trillian messenger skin “Trillian Live Messagewindow” by Scream81, originally hosted at http://forums.ceruleanstudios.com/showthread.php?t=105070.

Currently only works with Trillian versions 5.6 and below. I’ll update when/if it’s compatible with v6+.

TrillianLiveMessagewindow.zip

How to re-enable unsigned extensions in Firefox 50 without reinstalling them manually

The Problem

If you’ve recently upgraded Firefox you may be left with lots of unsigned extensions which need to be reinstalled. If you’ve followed our guide to allowing unsigned extensions in Firefox then you’re halfway there; but what if you don’t want to manually re-install every single one of your old or unsigned extensions, one-by-one?

Luckily, there is a way to automatically re-install all of them with very little effort.

The Solution

First of all, you should have already upgraded Firefox and enabled unsigned extensions. Now, to reinstall all your extensions in one go, do this:

1. Open your Firefox profile folder (%appdata%/Mozilla/Firefox/Profiles/[profile_id] or, from Firefox, navigate to about:support and click Show Folder). Ensure Firefox is closed.

2. Now open the extensions subfolder and temporarily move all of the files/folders to another location.

3. Open Firefox again; you should have no extensions now.

4. Close Firefox and move all those extension files/folders back to the extensions folder.

7. Re-open Firefox once more and you should see lots of new tabs asking you to install your old extensions. You can either click Install on each tab, or go to the Tools > Add-ons window and install/enable them all in bulk.

How to install or use unsigned extensions in newer versions of Firefox

The Problem

Recently Mozilla made a change to Firefox so that, as of version 48, all extensions (add-ons) must be signed in order to be installed or used.

I discovered this after updating from Firefox v40 to v50 and having literally all of my extensions disabled, with the very helpful message “[This extension] could not be verified for use in Firefox and has been disabled”.

What’s worse is that there is absolutely no option to over-ride this behavior, even for advanced users. Another case of “Mozilla knows best”, of course, and another nail in the coffin of user choice.

To use unsigned addons, Mozilla says you should use a Firefox developer version (“Nightly”), an Extended Support Release (ESR) or their “unbranded” browser which has an ugly black icon and no name.

All of these are, of course, unacceptably inflexible solutions which act as a giant middle finger to the user. But there is a way you can continue to use the branded version of Firefox while still using any unsigned addons.

The Solution

Firstly, with thanks to a post by user chaser__ on Reddit, do the following:
1. Browse to about:config and set the following preferences to false:

xpinstall.signatures.required
xpinstall.whitelist.required

2. Open your Firefox program folder (%programfiles%/Mozilla Firefox) and create a file called config.js with the following content (including leading comment line (“//”)):

//
try {
  Components.utils.import("resource://gre/modules/addons/XPIProvider.jsm", {})
    .eval("SIGNED_TYPES.clear()");
}
catch(ex) {}

3. From the same folder, open defaults/pref and create a file called config-prefs.js:

pref("general.config.obscure_value", 0);
pref("general.config.filename", "config.js");

4. Now close and restart Firefox and you will be able to install unsigned addons.

If you have a number of existing unsigned addons you’d like to continue using, then you can either manually reinstall them or see our post on How to re-enable unsigned addons in Firefox 50 without reinstalling them manually.

How to downgrade from Firefox 29 to Firefox 28.

Firefox has just been upgraded to version 29, and is apparently one step closer to being a clone of Google Chrome. As usual, the update is absolute crap and many users are incredibly angry.

So, to downgrade to version 28 of Firefox, just run the full v28 installer which can be found here:

ftp://ftp.mozilla.org/pub/firefox/releases/28.0/win32/en-US/Firefox%20Setup%2028.0.exe

Oh, you should also submit some negative feedback and your thoughts about the “upgrade”, here:

https://input.mozilla.org/en-US/?page=1

Thief 4: disable intro videos, mouse acceleration, startup errors, and framerate smoothing.

Thief 4 (2014) has just come out and already there are a few problems. And solutions.

Startup Error 0xc000007b

When launching Thief on 64-bit (x64) computers, you might see an error message like:
“0xc000007b the application was unable to start correctly”. The solution is:

1. Search within your C:\Windows folder for “D3DCompiler_43.dll” and delete all instances of this file from your system.
2. Download the Direct X Web Setup from Microsoft and install it.

If that doesn’t work you can carefully follow the steps in this video, except changing the game path to Thief’s path.

Disable Intro Videos

1. Open up [THIEF_DIR]\ThiefGame\Config\ThiefEngine.ini.
2. Delete or comment-out any lines beginning “StartupMovies”.

Disable Mouse Acceleration / Mouse Lag

1. [THIEF_DIR]\ThiefGame\Config\ThiefInput.ini
2. bEnableMouseSmoothing=False

Disable Framerate Smoothing

1. [THIEF_DIR]\ThiefGame\Config\ThiefEngine.ini
2. bSmoothFrameRate=False

Disable Framerate Lag / Buffering

1. [THIEF_DIR]\Engine\Config\BaseEngine.ini
2. OneFrameThreadLag=False

How to change Firefox bookmark icons (favicons) without extensions or addons!

Now that the Bookmark Favicon Changer extension for Firefox no longer works, you need an alternative way to customize the favicons of your bookmark items. And here it is!

1

1. Open up Firefox’s behind-the-scenes “profile” folder on your computer. On Windows 7/8, this is located at:

C:\Users\Your_Username\AppData\Roaming\Mozilla\Firefox\Profiles\Your_Profile_Folder

2. In that folder, create a new directory called “chrome”, if it doesn’t already exist.

3. Inside the “chrome” folder, create a new file called “userChrome.css”.

4. Open up userChrome.css and paste the following CSS code:

/* First line of userChrome.css must be this: */
@namespace url("http://www.mozilla.org/keymaster/gatekeeper/there.is.only.xul");

/* Custom favicon for this bookmark */
.bookmark-item[label="BOOKMARK_NAME_HERE"] image {
    width:0!important;
    height:0!important;
    padding: 0 0 16px 16px !important;
    background:url(BASE_64_STRING_HERE)!important; 
}

2

5. In the above code, there’s a few things you have to to edit:

i) Replace “BOOKMARK_NAME_HERE” with the title of your bookmark as it appears on your bookmark bar (e.g. “Reddit”).
You must supply a label, even if you don’t want any label to appear – see below for how to make this happen.

ii) Replace “BASE_64_STRING_HERE” with a base64-encoded string of your desired favicon, which you can obtain by uploading the icon to a website like this one.

3

6. You must give your bookmark a label in step 5 for this to work – but if you don’t want your icon to have a label (text), just add some more code:

/* Hide the text of this bookmark */
.bookmark-item[label="BOOKMARK_NAME_HERE"] {
    margin-right: 0px !important;
    width: 22px !important;
}
.bookmark-item[label="BOOKMARK_NAME_HERE"] > .toolbarbutton-text {
    display: none !important;
}
.bookmark-item[label="BOOKMARK_NAME_HERE"] image {
    margin-left: 4px !important;
}

Remember to replace “BOOKMARK_NAME_HERE” with your (now invisible) bookmark label!

4

7. Save the file and restart Firefox.

5

Done.